

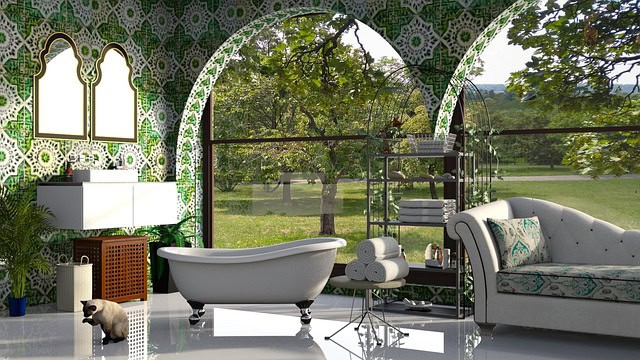
Are you planning to renovate your bathroom and wondering how different tile options would look in your space? Look no further than a bathroom tile visualizer.
A bathroom tile visualizer is a powerful tool that allows you to virtually preview different tile designs and patterns in your bathroom before making a purchase.
This innovative technology helps you visualize how various tiles would look on your walls, floors, or even in your shower.
In this article, we will explore the benefits of using a bathroom tile visualizer, how it works, the top features to look for, and provide you with a step-by-step guide on using one effectively.
Table of Contents
Benefits of Using a Bathroom Tile Visualizer

Using a bathroom tile visualizer offers numerous benefits that can make your tile selection process much easier and stress-free. One of the key advantages is the ability to see how different tile options would look in your specific bathroom layout. This eliminates the guesswork and allows you to make an informed decision based on your style and preferences. Additionally, a bathroom tile visualizer helps you save time and money by preventing costly mistakes. Instead of purchasing tiles that might not look as expected, you can experiment with various designs virtually and choose the one that best complements your existing bathroom fixtures and color scheme.
Another advantage of using a bathroom tile visualizer is the opportunity to explore different patterns and layouts. Whether you prefer a classic herringbone design or a modern geometric pattern, a tile visualizer enables you to see the impact of these choices in real time. This empowers you to get creative and experiment with various tile combinations, ensuring that your bathroom becomes a unique reflection of your style. Furthermore, the visualizer allows you to visualize how your selected tiles would look under different lighting conditions, helping you make an informed decision and achieve the desired ambiance in your bathroom.
How a Bathroom Tile Visualizer Works
A bathroom tile visualizer utilizes advanced technology to create a virtual representation of your bathroom. It typically involves a user-friendly interface where you can upload a photo of your existing bathroom or select a pre-existing template that closely resembles your space. Once the photo or template is uploaded, you can begin the customization process by selecting different tile options from a vast library of designs. The visualizer software then superimposes the selected tiles onto the photo, giving you a realistic preview of how they would look in your bathroom.
To ensure accuracy, most bathroom tile visualizers allow you to adjust the scale and position of the tiles, as well as rotate or flip them if needed. This level of customization ensures that you can precisely visualize your preferred tile design and make any necessary adjustments before making a final decision. Some advanced visualizers even offer additional features such as the ability to change the paint color on the walls or add virtual fixtures and accessories, enhancing the overall visualization experience.
Top Features to Look for in a Bathroom Tile Visualizer

When choosing a bathroom tile visualizer, it is essential to consider the features it offers to ensure you have the best user experience and accurate results. Here are some top features to look for:
1. Extensive Tile Library
To have a large selection of possibilities, a thorough library of tile designs is essential. Seek out a visualizer with a wide range of tile options, such as variations in color, pattern, and texture. This guarantees that you will be able to precisely see several design options and select the ideal tiles for your bathroom.
2. Customization Options
To get an exact representation of your intended design, you must be able to alter the tiles’ size, placement, and orientation. Make sure the visualizer you use enables you to precisely adjust the tiles to fit the size and design of your bathroom.
3. Realistic Rendering
A excellent visualizer ought to offer an accurate depiction of the tiles, lighting, and other components in your bathroom. This guarantees that the visual depiction is nearly identical to the real appearance, enabling you to base your decision on precise attractions.
4. User-Friendly Interface
Try to choose a visualizer that has an intuitive, easy-to-use interface. The complete procedure will be more pleasurable and accessible with a simple interface, especially for individuals with little technical expertise.
5. Additional Features
Some visualizers come with extra capabilities like the capacity to store and share your designs, get professional advice and inspiration, or integrate with e-commerce sites. Take into account these extra elements to improve your visualizer experience in general.
You can choose a bathroom tile visualizer that best suits your needs and helps you visualize your ideal bathroom by taking into account these important characteristics.
Step-by-Step Guide on Using a Bathroom Tile Visualizer
Now that you understand the benefits and features of a bathroom tile visualizer, let’s explore how to use one effectively. Follow this step-by-step guide to make the most out of your tile selection process:
1. Choose the Right Visualizer
Start by researching and selecting a bathroom tile visualizer that aligns with your requirements. Consider the features discussed earlier and find a visualizer that offers the flexibility and functionality you need.
2. Prepare Your Bathroom Photo
If the visualizer allows you to upload your bathroom photo, make sure to take a well-lit, clear photo of your existing bathroom. Ensure that the walls, floors, and any other relevant areas are visible in the photo for accurate tile placement.
3. Upload or Select a Template
Upload your bathroom photo or choose a template that closely resembles your bathroom layout. This will serve as the base for your tile visualization.
4. Explore Tile Options
Browse through the visualizer’s tile library and select the tiles you are interested in. Experiment with different colors, patterns, and textures to visualize various design possibilities.
5. Customize and Position the Tiles
Use the visualizer’s customization tools to adjust the scale, position, and orientation of the tiles. Ensure that they align with your bathroom’s dimensions and layout for a realistic preview.
6. Experiment with Lighting and Accessories
If the visualizer offers additional features such as lighting adjustments or virtual accessories, take advantage of them to further enhance your visualization. Play with different lighting effects to see how they impact the appearance of the tiles.
7. Save and Review Your Designs
Once you are satisfied with a particular tile design, save it for future reference. Take the time to review and compare multiple designs to ensure you make the best choice for your bathroom.
By following this step-by-step guide, you can effectively use a bathroom tile visualizer to explore different design possibilities and make an informed decision.
Best Free Bathroom Tile Visualizers Available
Here are some of the best free bathroom tile visualizers available for you to explore:
1. TilePlanner
TilePlanner is a versatile bathroom tile visualizer that allows you to create stunning 3D designs of your bathroom. It offers an extensive tile library, customization options, and realistic rendering. You can experiment with different tile layouts, colors, and patterns to visualize your dream bathroom.
2. RoomSketcher
RoomSketcher is a popular visualizer that offers a range of design tools, including a bathroom tile visualizer. With RoomSketcher, you can create a 2D or 3D model of your bathroom and experiment with different tile options. It also provides access to a vast library of tiles and accessories to enhance your visualization.
3. Beaumonts Tile Visualizer
Beaumont Tile Visualizer is a user-friendly tool that enables you to visualize different tile options in your bathroom. It offers a wide range of tile designs and allows you to customize the scale, position, and orientation of the tiles. You can also experiment with different lighting effects for a realistic preview.
These are just a few examples of the many free bathroom tile visualizers available. Explore these tools and find the one that suits your needs and preferences.
Comparison of Different Bathroom Tile Visualizer Tools
To help you make an informed decision, let’s compare the features and functionalities of the previously mentioned visualizers:
| Visualizer | Tile Library | Customization Options | Realistic Rendering | User-Friendly Interface | Additional Features |
|---|---|---|---|---|---|
| TilePlanner | Extensive | Yes | Yes | Yes | Access to expert tips and inspiration |
| RoomSketcher | Vast | Yes | Yes | Yes | Integration with online shopping platforms |
| Beaumonts Tile Visualizer | Wide range | Yes | Yes | Yes | Save and share your designs |
By comparing these visualizers, you can determine which one aligns with your specific needs and preferences.
Tips for Using a Bathroom Tile Visualizer Effectively

To make the most out of your experience with a bathroom tile visualizer, consider these tips:
- Take accurate measurements of your bathroom before using the visualizer to ensure precise tile placement.
- Experiment with different tile combinations to find the perfect one that complements your existing fixtures and color scheme.
- Consider the overall style and ambiance you want to achieve in your bathroom and choose tiles accordingly.
- Use the visualizer’s customization options to adjust the scale and position of the tiles to match your bathroom’s dimensions.
- Take advantage of additional features such as lighting adjustments or virtual fixtures to enhance your visualization.
- Save multiple designs and review them over time to ensure you make an informed decision.
By following these tips, you can effectively use a bathroom tile visualizer and find the perfect tiles for your dream bathroom.
Additional Resources for Bathroom Tile Visualizers
If you want to further explore bathroom tile visualizers, here are some additional resources to consider:
- The Ultimate Guide to Bathroom Tile Visualizers
- 10 Tips for Using a Bathroom Tile Visualizer
- Choosing the Right Tiles for Your Bathroom
These resources provide valuable information, tips, and inspiration to help you navigate the world of bathroom tile visualizers and make the best tile selection for your bathroom.
Conclusion
A bathroom tile visualizer is a powerful tool that can simplify and enhance your tile selection process. It allows you to visualize different tile designs, patterns, and layouts in your bathroom before making a purchase. By using a bathroom tile visualizer, you can save time, and money, and prevent costly mistakes. Consider the top features discussed in this article when choosing a visualizer and follow the step-by-step guide to use it effectively. Explore the best free bathroom tile visualizers available and take advantage of additional resources to make an informed decision. With the help of a bathroom tile visualizer, you can create the bathroom of your dreams.
Can I use a bathroom tile visualizer on my smartphone?
Yes, many bathroom tile visualizers are available as mobile applications, allowing you to use them conveniently on your smartphone or tablet.
Are there any limitations to using a bathroom tile visualizer?
While a bathroom tile visualizer provides an accurate representation of how tiles would look in your bathroom, it is essential to consider factors such as lighting variations and monitor settings that may affect the actual appearance.
Can I use a bathroom tile visualizer if I’m not tech-savvy?
Yes, most bathroom tile visualizers are designed with user-friendly interfaces, making them accessible to individuals with limited technical knowledge.
Can I save my designs from a bathroom tile visualizer?
Many visualizers allow you to save your designs for future reference. This enables you to compare different options and make an informed decision.
Can a bathroom tile visualizer help me choose the right grout color?
While the primary focus of a bathroom tile visualizer is on the tiles themselves, some visualizers may offer options to experiment with different grout colors as well.